Thursday, July 6, 2017


             My Organizational Tips and Tricks for the Classroom
                            
                       
I LOVE organizing my classroom and making it look cute! I'm going to share with you some of my tips and tricks that I've used in the past. I believe that the more organized you can be at the beginning of the year, the rest of the year will be a whole heck of a lot easier to manage. I've also noticed that my students pick up on my organizational techniques and then they also want to be like that. So, it not only helps me, but it helps my students learn how to be neat and organized to help them be successful. 

                               My Classroom Library:
I have colored tubs from Lakeshore that I labeled with foam letters. I organize my books from A-Z and by genres. I also organize my back to school books together on the book stand.  The students use the A-O tubs during reader's workshop and the genre tubs during center time.  If you are interested in checking out my Reader's Workshop Mini-Lessons, click here

If you're interested in my genre posters above my library, click here

                         My Classroom Carpet Area:
I organize my read aloud/carpet area with an easel on one side, author's chair in the middle, and big book stand on the other side. On my big book stand, I have my anchor charts. On my easel, I have poems, expo markers, and pocket charts. Under my chair I keep my writer's workshop folders in a tub, markers, highlighters, oops tape, popsicle sticks with the student's numbers, pencils and sharpies. This way I can grab the supplies that I need immediately instead of having to get up and waste time finding my supplies. I use all of these supplies daily for anchor charts, interactive writing, calling on students and illustrating. When you are on a schedule, it helps to have everything handy and ready to go! This is one of my favorite places in my classroom...because this is where the magic happens! 
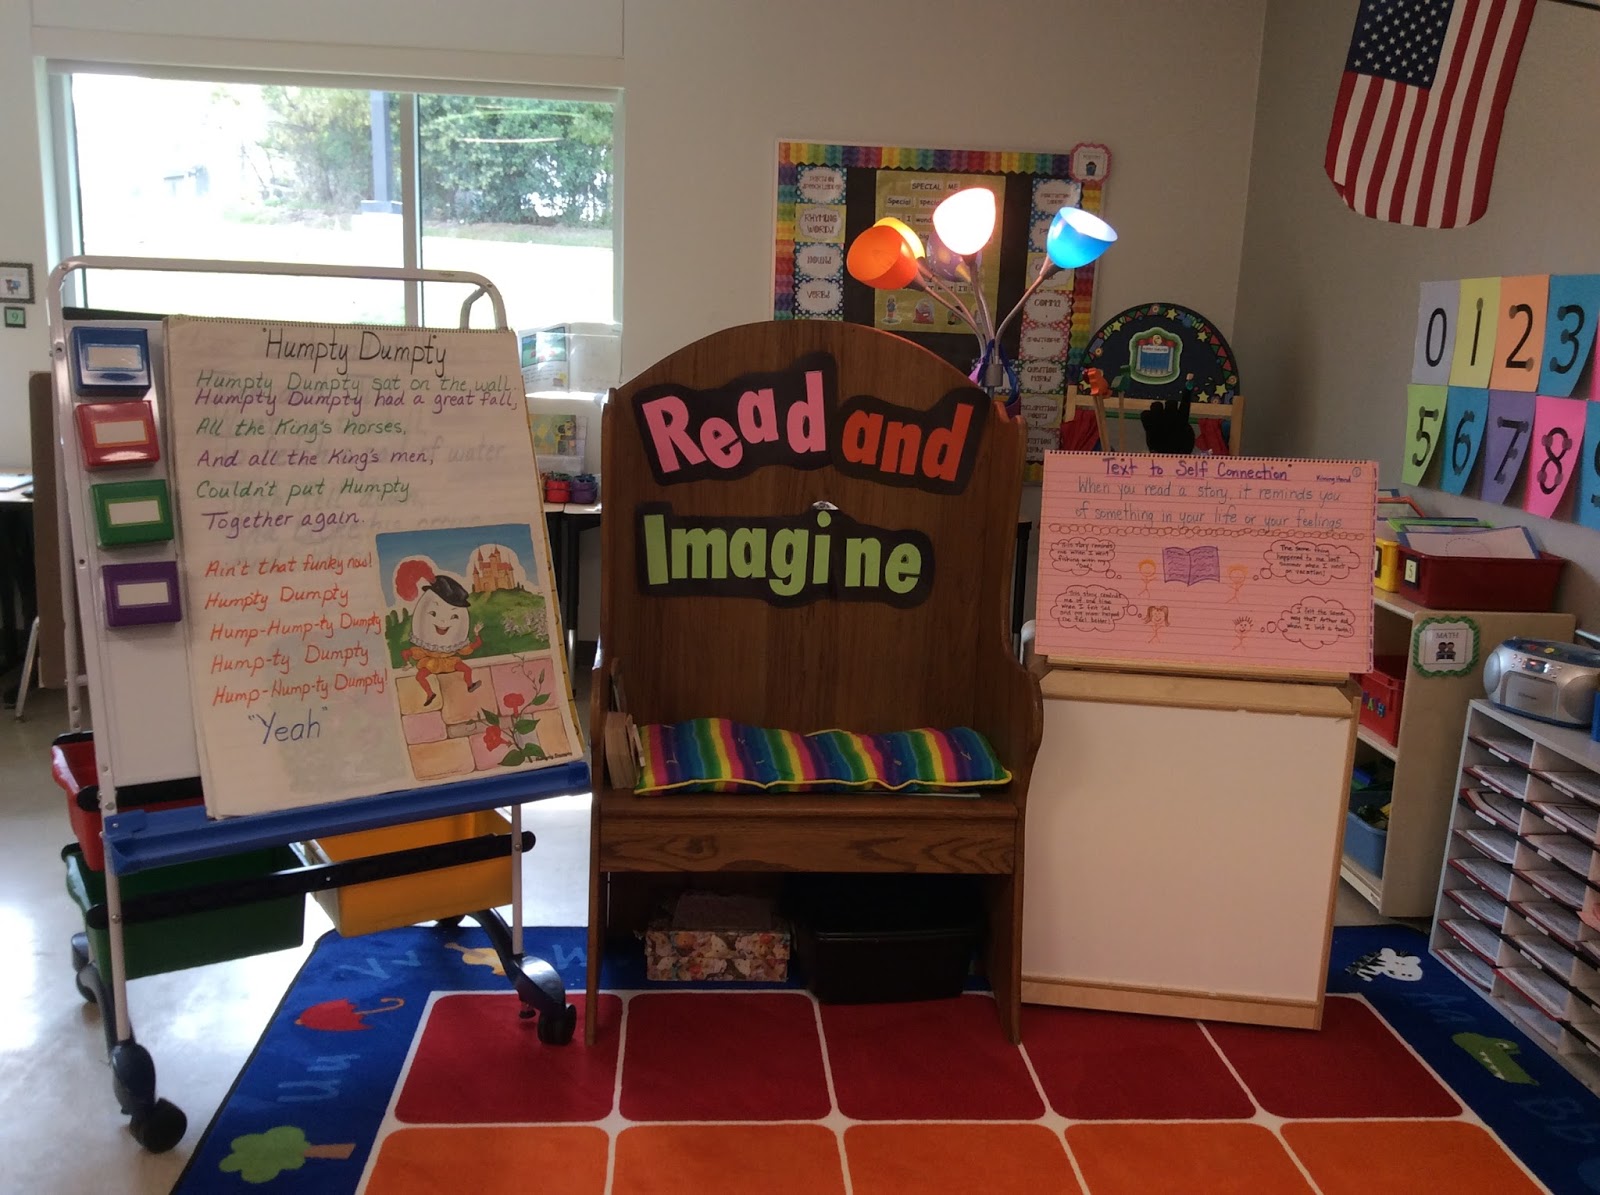

Author's Chair
These are my math work station tubs. I have them numbered from 1-8. I chose to keep them open at the top so I can easily take the materials out and put new ones in without having to open lids. I teach my students to organize these tubs before putting them away and I reward them with bonus bucks if they have the most organized tub. They love this and math workstations is one of their favorite time of the day. If you notice to the side, I have my math rotation board with the student's numbers on one side and the tub number on the other side. I rotate these numbers daily. I will go into more info about these later. If you are interested in checking out one of my math workstation games and activities for the beginning of the year, click here


This is how I organize my math games mats for guided math: 

This is how I organize my mentor texts: I have tubs that are labeled Reader's Workshop, Writer's Workshop and Math Workshop. Inside the tubs I have hanging files that are separated into skills. So, for Reader's Workshop, I have them separated into: Synonyms, Cause and Effect, Main Idea, Learning to Read...etc.
For Writer's Workshop I have the books separated into: Nouns, Verbs, Adjectives, Learning to Write.... etc.
For Math Workshop I have them separated into: Money, Place Value, Addition, Subtraction, Geometry... etc.
This is VERY helpful if I need to find a mentor text fast or if another teacher comes and asks me to borrow a book.  This method has saved me tons of time searching for books! If you're interested in checking out my Reader's Workshop mentor text list by genre and skill, click here If you're interested in checking out my Writer's Workshop mentor text list by genre and skill, click here
Mentor Text Organization
This is how I organize my writer's workshop papers. I got this awesome banker's box from Office Depot and it helps tremendously. I have each slot numbered with each paper the students need for writer's workshop. Whatever paper they need, I just tell them to get paper number 1 to 19, and they just know to look for the number without having to read. This really helps at the beginning of the year when not all my students can read well yet. I just LOVE this shelf! It has really helped with writer's workshop. If you are interested in checking out my Writer's Workshop Mini-Lessons, click here


Writer's Workshop Organization

                                        Guided Reading Baskets
This is how I organize my guided reading baskets. I have 5 groups that I meet with weekly. 
Turquoise: low
Tangerine: low middle
Magenta: middle
Violet: high middle
Jade: high 

This is how I organize my "I CAN" statements. I made these blank posters and laminated them so I can just erase the old statements with a tissue and write the new ones with an EXPO marker. I have them separated into subjects: Reading, Writing, Spelling, Math, Science and Social Studies. It also helps me stay on track with the skills and objectives that I need to cover for the week. 
If you are interested in these posters, you can click: here

"I CAN" Posters
This is how I organize my cubbies. Each student has a colored browsing box filled with books they have colored and put together. These tubs were ice boxes that I spray painted. I put a foam numbers and rainbow duct tape on the front of the box. The students know when they put the box away to make sure the number is on the outside. My students know that they can use their browsing box when they get finished early and need something else to do while they are waiting for everyone else to finish an assignment. This helps with them asking "What do I do now?" Also inside the cubbies I have their math tool box, clipboard, white board, and study carol. 
Cubbies with Browsing Boxes

This is how I organize my supplies at my guided reading table. I made a spinning caddie with materials from Hobby Lobby. I glued the pink plate onto a lazy susan, then glued the colored pails onto the pink plate. I separated my markers, pens, scissors, highlighters, pencils and sharpies. This comes in handy during guided reading and writer's workshop. I have all my supplies handy and the best part...it spins! 

Spinning Supply Caddie

This is how I organize my thematic units. I made cute cover pages for each one and separated them into binders. I have a big wardrobe closet that I keep all of my binders in. This helps me just grab the binder that I need to plan the upcoming unit.
If you are interested in checking out my thematic unit cover pages, click here

Thematic Unit Cover Pages

This is how I organize my published books for writer's workshop. I got magnetic pockets from Lakeshore and they work amazingly! Every time one of my students publish a book, they are displayed on this wall. They LOVE to see their work of art! 

Publishing Wall
This is how I organize my literacy and math rotation schedule. I rotate my math stations daily and the literacy centers weekly. The students can look at their magic number on the cards to see which tub or centers they will be going to that day or week. This also saves me time and headache. If you're interested in checking out my literacy center resource with I CAN cards, center templates and how to launch them at the beginning of the year, you can click  here You can also check out my You Tube video explaining what each picture is here

Classroom Centers and Math Workstations
Here are some of my favorite centers and how I organize them: 

Writing Center
If you're interested in checking out my writing center resource, click here. It includes templates and "I CAN" posters for: shape books, poetry, making a list, letter writing, postcards, my sticker story, my favorite holiday, my favorite letter of the alphabet, tiny moments and writing a how to story. You can also watch my You Tube video of my writing center: here

Theme, and Museum Centers

Science Center

Author Study

If you're interested in checking out my resource for a Kevin Henkes author study, click here

Poetry Center

If you are interested in checking out my Focus Poetry resource that includes poems and interactive notebook activities for every month and holiday, click here


Big Books, Geography and Finger Puppet Centers


This is how I organize my word wall area. I put it at eye level so when the students sit on the carpet, they can see it clearly! I use small clothes pins to put the words on the ribbons. I used black chevron ribbon and stapled them to the ABC circles. The students LOVE to help me put the words on here. If you are interested in checking out my word wall resource, it has the ABC circle cards and the first grade sight words with assessments. Click here


Word Wall 

Student Community Supples
This is how I organize my student's community supplies on their desks. I have glue, highlighters, small diaries, a mini broom, pencils, silver sharpies and hand sanitizer. 


Students' Materials and Supply Boxes
This is how I organize my students' supplies. I zip tied two crates together. Each student has a basket with all of their notebooks, folders and incomplete work. Their crayon box is also kept in the crate. The basket you see at the top of the crate is for work that gets turned in every day. 

Teacher Organization for Materials and Supplies
This is how I organize my weekly copies, mentor texts and supplies. I can find everything that I need quickly! 


This was my classroom on the first day of school. I hope you got some great ideas about organizing your own classroom for the fall! 

First day of school

Have an amazing school year! Happy Teaching!
Love,
Kara 


Tuesday, June 20, 2017

Writer's Workshop Summer Training 2017


I had an amazing experience today giving a training on Writer's Workshop! This has been a long time goal of mine to give trainings on what I love to teach....writing! It gives me a sense of fulfillment, just knowing I can touch the lives of more children through teachers. I also enjoy seeing teachers light up and excited about teaching writing. 
This of course took weeks for me to plan out. When you are teaching other teachers how to implement a new program into their classroom, you really have to have many different components during the training to make it fun! I want them to walk away with fresh new ideas about writing and hope they can implement some of it in their own classrooms next year. Then I know I did my job! 

I made a powerpoint of photos, activities and ideas to share with the teachers... which also helped me stay on track too! 

You have to have visuals to show so the teachers can see the real products you use! I had posters, anchor charts, vocabulary cards, published books, supplies and materials. I even had door prizes! 


I also put all of my mentor texts on display that the teachers could use for their mini-lessons! Some of these books were new to the teachers and they were excited to learn about them! 

During the workshop we had a lot of opportunities to experience the writing process first hand. The teachers each wrote their own story and then read it to a partner. They switched stories and practiced editing each other's paper. They used markers to edit the capitals and periods, and underlined the sentences with different colors. This is exactly what they would train their students to do in the classroom. They had a lot of fun! 
It's also important to give teachers a chance to talk, discuss and reflect on their teaching... it helps get new ideas! I even learned a lot of new ideas today too. It's so fun to hear what works for others as well! 

The best part of the training (in my opinion) was the make and take! Each teacher got to pick an anchor chart from my mini-lessons and make their own! What a wonderful way to start planning for the new school year! 


Everyone got a lot of new ideas today and all walked away with a lot of new information, activities and were extremely happy! If you haven't signed up for summer PD yet and are interested in signing up for August 9th at 12:30... please come and join me! I'd love to see you! Have a wonderful summer! 
Love,
Kara 

Saturday, June 3, 2017

End of the Year Writing Celebration...Fairy Tale Ball!


End of the Year Writing Celebration....Fairy Tale Ball! 


Fairy Tale Ball Tablescape
At the end of the year, our first graders get to pick a fairy tale to retell from beginning to end. They use all the writing skills that they have learned from the whole year. They use nice handwriting, beautiful illustrations,  great sentences, lots of adjectives and dialogue. We work very hard in May to take this story through the writing process to publish this book. This is the story they will be reading at our Fairy Tale Ball.  I've made fairy tale writing templates for our students to use for this. 


The students use these templates for Brainstorming, First Draft, Student Conference, Proofreading, Teacher Conference, Editing and Revision, Final Draft, and Publishing. They have a blast retelling their favorite fairy tale and getting to illustrate their pictures. 


We discuss all the story elements for a fairy tale and what it usually has that makes so special. We use this anchor chart: 


We discuss the three main authors of Fairy Tales and what country they were from: Charles Perrault, Hans Christian Andersen and The Grimm Brothers. We use this poster to help us decide which fairy tale we want to write about: 


We also use these story element cards to mix the magic! 

We cut up the cards, and put them in a mixing bowl while we are discussing the story elements, and use a magic wand...the students LOVE this! 


On the day of the Fairy Tale Ball, each student brings a food that goes along with their story. So, if they wrote about Rapunzel, they bring radishes. If they wrote about Snow White, they bring apples slices.... catch on? They bring a basket to put their food in for our tablescape. I also have one parent make a castle cake for us to enjoy. Here are some examples of cakes I've had in the past: 


On the day of the Fairy Tale Ball, they get to dress up like their character from their story. They get to read their story to the parents and then the parents write them a compliment in the back of their book. The students love this! Here are some of our characters from our Ball with their published story. Can you see the gold sticker on the cover? 
The Snow Queen 

Beauty and the Beast

The Gingerbread Man 
The students had a blast at our Fairy Tale Ball. Maybe next year you'd like to have a fairy tale ball too? If you are interested in checking our my fairy tale writing resource click here:Once Upon a Time...A Fairy Tale Writing Unit

I hope you live Happily Ever After! 
Love, Kara 


Saturday, January 21, 2017

Let's Spring Into Science! Investigations and Experiments from January to May


If you LOVE teaching your science curriculum through experiments and investigations, keep on reading! I've created a packet full of fun and engaging experiments and investigations from January to May. All of these experiments I've tried out in my classroom, and my students LOVE them! I've categorized them into months using themes to drive the skill and focus. In this packet are lesson plans with mentor texts, anchor charts, interactive notebook activities, craftivities, expository writing templates and vocabulary cards.  

Monthly Themes:
January: Winter, Arctic, Antarctic, Penguins, MLK
February: Objects in the Sky, Valentine's Day, Presidents, America
March: Spring, Weather, Texas, St. Patrick's Day
April: Plants, Life Cycles, Insects, Rainforests, Easter
May: Rocks and Volcanoes, Ocean and Beach, End of Year

By using these suggested themes, planning science investigations and experiments are super easy and fun! I hope you enjoy them!

For January the science experiments and investigations are:
I See Icy Icicles
Winter Investigation using 5 senses
Precipation Investigation
Blubber Experiment
Glacier and Iceberg Investigation
How to Make a Marshmallow Igloo
Diversity Experiment


For February, they are:
Will This Melt My Heart?
Shadow Investigation
How To Make a Lincoln Log Cabin
Phases of the Moon
Constellation Investigation


For March, they are:
Investigating Spring using 5 senses
Pinwheel Investigation
Oil Experiment
What Makes a Rainbow?
Cloud in a Cup
Cloud Investigation
How to Make Chili


For April, they are:
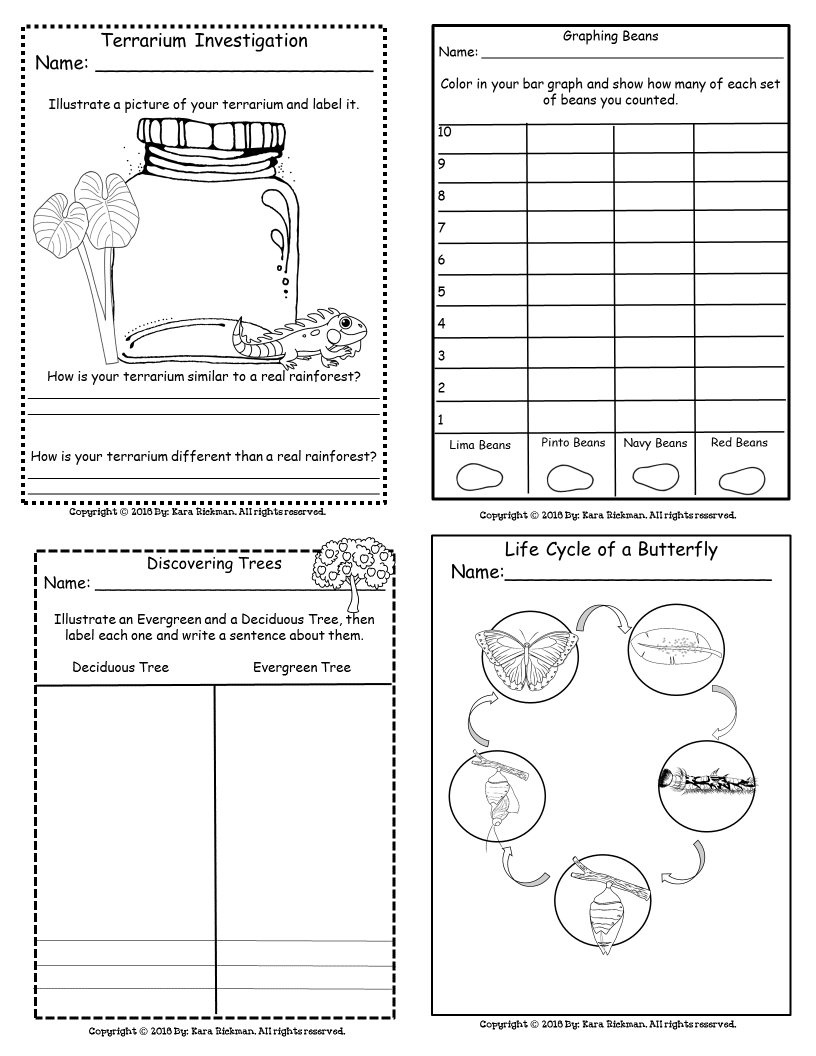
Tree Investigation
Sunflower Investigation
Bean Investigation
Butterfly Investigation
Ladybug Investigation
Frog Investigation
Terrarium Investigation


For May, they are:
Edible Dirt Cup Investigation
Rock Investigation
Layers of the Earth
My Pet Rock Investigation
Volcano Experiment
Shark Investigation
Whale Investigation
How to Make an Ocean in a Jar
Shell Investigation


So...there you have it! Science in the Spring! I hope you got some great ideas about about how to incorporate science investigations and experiments in your classroom! If you are interested in checking out my Spring Into Science packet, click below.
Love, Kara 

Let's Spring into Science: Investigations and Experiments from January to May