
I LOVE organizing my classroom and making it look cute! I'm going to share with you some of my tips and tricks that I've used in the past. I believe that the more organized you can be at the beginning of the year, the rest of the year will be a whole heck of a lot easier to manage. I've also noticed that my students pick up on my organizational techniques and then they also want to be like that. So, it not only helps me, but it helps my students learn how to be neat and organized to help them be successful.
My Classroom Library:
I have colored tubs from Lakeshore that I labeled with foam letters. I organize my books from A-Z and by genres. I also organize my back to school books together on the book stand. The students use the A-O tubs during reader's workshop and the genre tubs during center time. If you are interested in checking out my Reader's Workshop Mini-Lessons, click here

My Classroom Carpet Area:
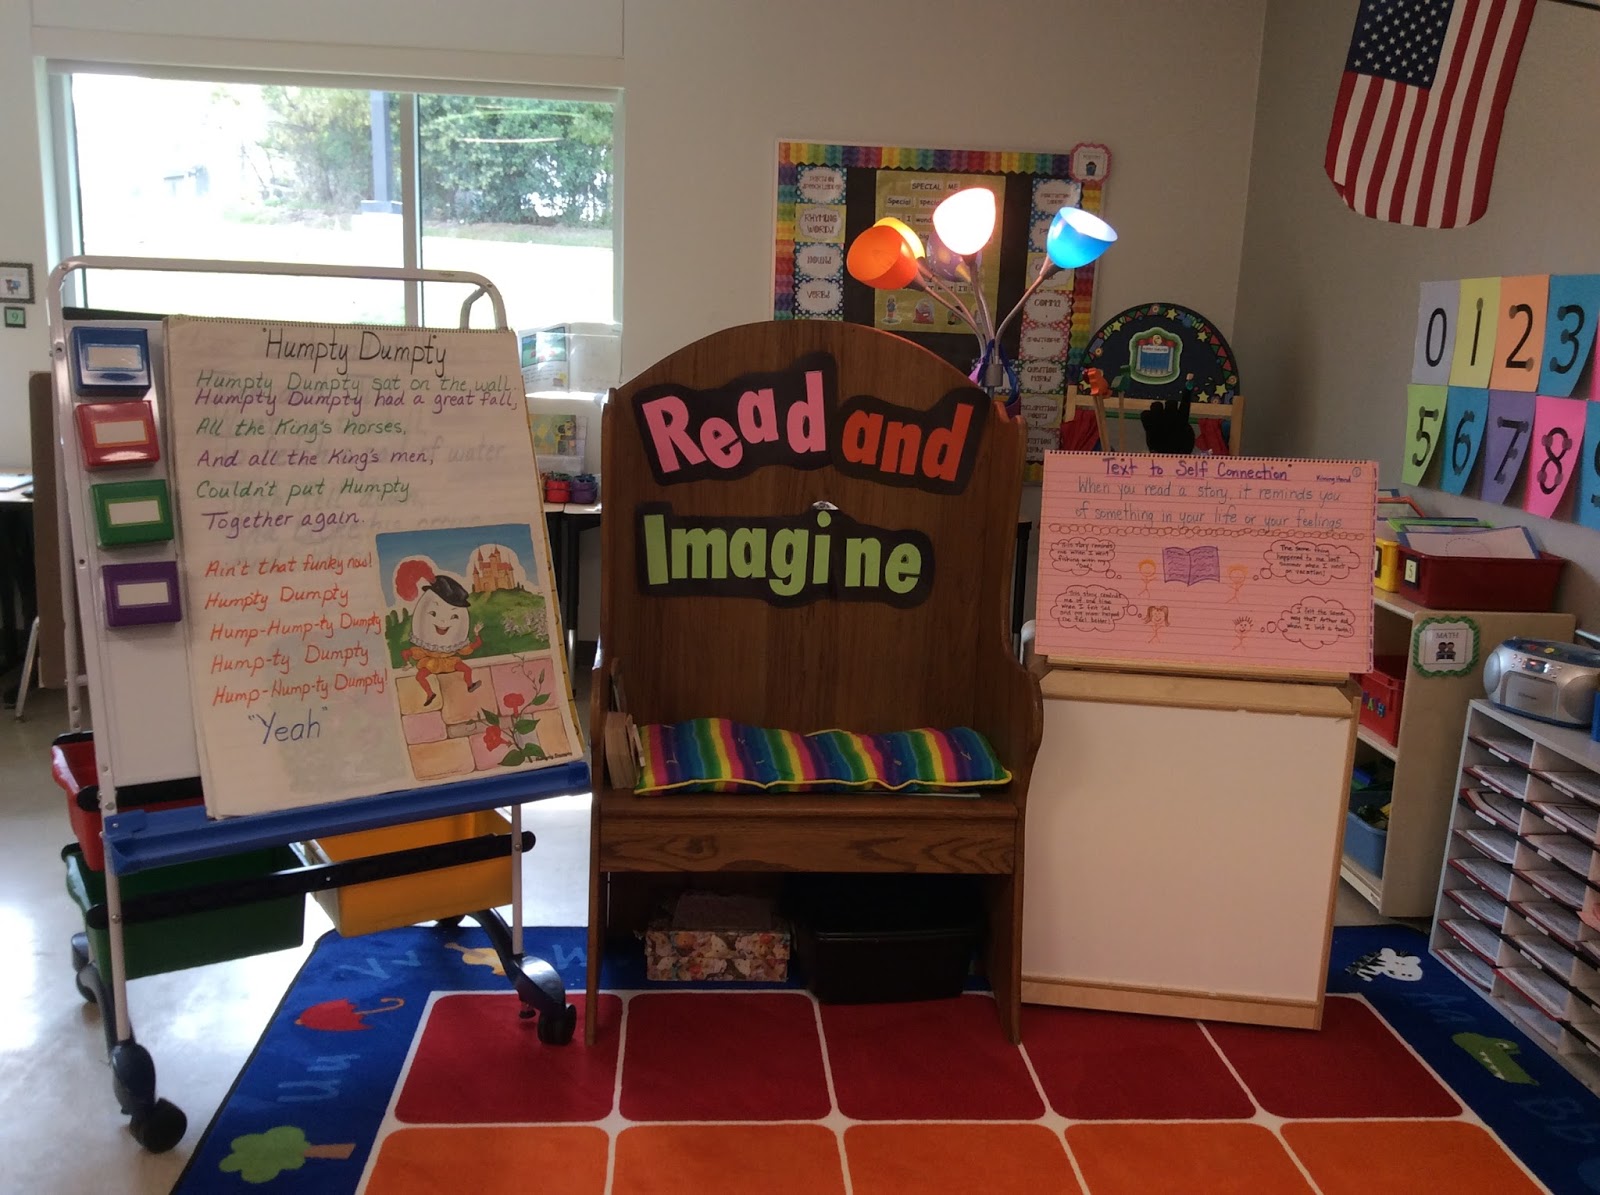
I organize my read aloud/carpet area with an easel on one side, author's chair in the middle, and big book stand on the other side. On my big book stand, I have my anchor charts. On my easel, I have poems, expo markers, and pocket charts. Under my chair I keep my writer's workshop folders in a tub, markers, highlighters, oops tape, popsicle sticks with the student's numbers, pencils and sharpies. This way I can grab the supplies that I need immediately instead of having to get up and waste time finding my supplies. I use all of these supplies daily for anchor charts, interactive writing, calling on students and illustrating. When you are on a schedule, it helps to have everything handy and ready to go! This is one of my favorite places in my classroom...because this is where the magic happens!
 |
| Author's Chair |
These are my math work station tubs. I have them numbered from 1-8. I chose to keep them open at the top so I can easily take the materials out and put new ones in without having to open lids. I teach my students to organize these tubs before putting them away and I reward them with bonus bucks if they have the most organized tub. They love this and math workstations is one of their favorite time of the day. If you notice to the side, I have my math rotation board with the student's numbers on one side and the tub number on the other side. I rotate these numbers daily. I will go into more info about these later. If you are interested in checking out one of my math workstation games and activities for the beginning of the year, click here

This is how I organize my math games mats for guided math:

This is how I organize my mentor texts: I have tubs that are labeled Reader's Workshop, Writer's Workshop and Math Workshop. Inside the tubs I have hanging files that are separated into skills. So, for Reader's Workshop, I have them separated into: Synonyms, Cause and Effect, Main Idea, Learning to Read...etc.
For Writer's Workshop I have the books separated into: Nouns, Verbs, Adjectives, Learning to Write.... etc.
For Math Workshop I have them separated into: Money, Place Value, Addition, Subtraction, Geometry... etc.
This is VERY helpful if I need to find a mentor text fast or if another teacher comes and asks me to borrow a book. This method has saved me tons of time searching for books! If you're interested in checking out my Reader's Workshop mentor text list by genre and skill, click here If you're interested in checking out my Writer's Workshop mentor text list by genre and skill, click here
 |
| Mentor Text Organization |
 |
| Writer's Workshop Organization |

This is how I organize my guided reading baskets. I have 5 groups that I meet with weekly.
Turquoise: low
Tangerine: low middle
Magenta: middle
Violet: high middle
Jade: high
This is how I organize my "I CAN" statements. I made these blank posters and laminated them so I can just erase the old statements with a tissue and write the new ones with an EXPO marker. I have them separated into subjects: Reading, Writing, Spelling, Math, Science and Social Studies. It also helps me stay on track with the skills and objectives that I need to cover for the week.
If you are interested in these posters, you can click: here
 |
| "I CAN" Posters |
 |
| Cubbies with Browsing Boxes This is how I organize my supplies at my guided reading table. I made a spinning caddie with materials from Hobby Lobby. I glued the pink plate onto a lazy susan, then glued the colored pails onto the pink plate. I separated my markers, pens, scissors, highlighters, pencils and sharpies. This comes in handy during guided reading and writer's workshop. I have all my supplies handy and the best part...it spins! |
 | ||||||||||||||||
| Spinning Supply Caddie This is how I organize my thematic units. I made cute cover pages for each one and separated them into binders. I have a big wardrobe closet that I keep all of my binders in. This helps me just grab the binder that I need to plan the upcoming unit. If you are interested in checking out my thematic unit cover pages, click here
|


